20121029

Android development

Ages ago i had a look at Google's development environment, found it rather complex and then it was discontinued.

Today i stumbled over some documentation based on http://www3.ntu.edu.sg/home/ehchua/programming/android/Android_HowTo.html which again was more complicated than it need to be.


My steps:

  1. install JDK from http://www.oracle.com/technetwork/java/javase/downloads/jdk7u9-downloads-1859576.html
  2. install Eclipse Classic 4.2.1 from http://www.eclipse.org/downloads/ and untar
  3. run eclipse and from Help -> Install New Software -> Add add https://dl-ssl.google.com/android/eclipse/
  4. restart eclipse when it asks for it
  5. from Windows -> Android SDK Manager install the tools, the android versions you're interested in etc
  6. now you can create a virtual android device from Windows -> AVD Manager.

20120929

64 core supercomputer for $199

Four weeks to go to raise $750k (over $80k already in two days). Get yours in May 2013 for $99:
http://www.kickstarter.com/projects/adapteva/parallella-a-supercomputer-for-everyone

20121003: Ah, not 64 core is it said in the title, 'only' 16. Still worthwhile! Or get two for $199 ... but how much is a 64core version going to be? Over $150k in six days, still on track to achieve the goal.

20121004: Ok, back to 64 core in the title now there is an option to get 64cores! Not yet on track to achieve that one - not even on track for the $750k ... looks like it'll be $35k too low.

20121027: Wow, funding was reached. Didn't think that was going to happy, funding currently stands at $780K and still half a day to go ... not likely that we'll reach $3m (to get 64 cores) but then i didn't think we'd reach $750k. Who knows, may still happen!

20120719

Raspberry Pi - Raspbian, Wheezy & sound

first SD card image based on the Raspbian distribution

Good:

  • based on Wheezy,
  • ssh enabled by default,
  • raspi-config makes it easy to extend the image to the entire sd card, configure how much memory goes to graphics etc.,
  • sound driver is loaded automatically,
Bad:
  • can't get audio to work from python-pyao, doesn't want to open any device i tried, even installed pulse (but audio isn't broken as mpg123 works fine...).

20120709

Arduino + Canbus shield + GPS Receiver


Ingredients:
Also required:

  • soldering iron
  • patience & basic soldering skills (to solder the headers onto the Canbus shield)
  • arduino software
  • computer, car/van etc.

Things to keep in mind:

  • when you want to stop logging: press on the joystick until the leds go out so that the file on the sd card is properly closed
  • make sure to reset if you plugin before starting the engine, not all pids are available at that point
  • with the engine off my engine runs at 280 rpm...
  • powered from the canbus, so i disconnect before leaving the vehicle in case it would drain the battery


Still todo:

  • solder on the lcd display, build an interface that shows fuel consumption
  • see if there is a more efficient way to log all available sensors (on startup  check which pids are available and then log all of the available ones)
  • print a case
  • sleep mode: if the engine is off (or rpm is 280 for a couple of times in a row), switch all leds off, switch off the gps (if possible), check every n seconds if the engine was started etc.


20120624

Raspberry Pi - alsa

Install alsa:

  • sudo apt-get alsa

and make sure that the module is loaded:

  •  sudo modprobe snd-bcm2835

20120623

Raspberry Pi - ssh


Using the Debian squeeze image from http://www.raspberrypi.org/downloads

I'd like to be able to run it headless, need ssh running automatically after boot:
  1. ssh-keygen (answer the prompts)
  2. sudo update-rc.d ssh default
  3. sudo reboot
or

  1. cd /boot
  2. sudo mv boot_enable_ssh.rc boot.rx
  3. sudo reboot


20120617

Robot hand from seven parts - 2 (some photos)


The finger bend both ways: the finger tips can therefore are either pads or sharp.

From the base of the wrist to the tip of a finger is about 27cm. If i ever get to build the entire robot it'll be approx 2m70 high...

Robot hand from seven parts - 1

Take one or more of each of the following parts, snap or friction fit them together and you get a robot hand!

Snap the first two together to create a rotating joint:


Hold a couple of those together with a connection piece and you get finger:
At one end of the finger place a finger tip:
Give the thumb an additional degree of rotation:

 Use a spacer between the fingers...
when you slide them on the wrist, then snap the thumb on and the hand is ready.

Partslists:

Part 1 Part 2Part 3Part 4
Part 5Part 6Part 7


Finger:
  • Part 1 : 3
  • Part 2 : 3
  • Part 3 : 3
  • Part 4 : 1

Thumb:

  • Part 1 : 4
  • Part 2 : 4
  • Part 3 : 4
  • Part 4 : 1
  • Part 5 :1

Hand:

  • Part 1 : 16
  • Part 2 : 16
  • Part 3 : 16
  • Part 4 : 5
  • Part 5 : 3
  • Part 6 : 4
  • Part 7 : 1


20120516

Installing SImpleOpenNI for an Asus Xtion


  • follow the instructions from simple-openni/wiki/Installation
  • OpenNI installs very quickly, on to Nite
  • which fails with a " niReg: error while loading shared libraries: libOpenNI.so: cannot open shared object file: No such file or directory."" error 
  • but the file is there! Google for it: reboot or run "ldconfig -v", "ldconfig -v" it is
  • now Nite installs
  • install the Sensor
  • and 'install' SimpleOpenNI = copy the files across - easy!
  • and then we go and find some sample code to run!

20120421

Upgrading the firmware on my Ultimaker

I've never looked much at upgrading the firmware on my Ultimaker and the few times i did try it never worked... Up to now that's never been an issue ... but i just ordered an Ultimaker Controller. And that requires Marlin: "For older firmwares you should upload new firmware". So it's time to get the firmware updated!

Let's try one more time:


And it still fails...

When it fails it tells you to look at the console, so better do that: it complains about not being able to access my usb port /dev/ttyACM0, as there is a problem with the lock file. Ok, that's easy: delete the lock file (maybe it's left behind for some reason...).

Nope, doesn't like that either, but there is progress! Instead of complaining about the lock file it's now getting timeouts.

Time for another look in the console, it shows the command it's trying to run. Hmm, let's kill replicatorg and run the command:  avrdude -Cavrdude.conf -cstk500v2 -P/dev/ttyACM0 -b115200 -D ... (all paths are stripped from this example, i just copied and pasted the command from the console without any editing).

And that works!

20120313

Roomba & Rootooth

Just got a Rootooth for my Roomba and initially it didn't work! (so yes indeed, that means that eventually i got it working)


Step one: is my bluetooth dongle working?
# hciconfig hci0

hci0: Type: BR/EDR Bus: USB BD Address: 01:23:45:67:89:01 ACL MTU: 1021:8 SCO MTU: 64:1
RX bytes:290 acl:0 sco:0 events:6 errors:0
TX bytes:21 acl:0 sco:0 commands:7 errors:0
UP RUNNING

Yes!


Step two: can i see the roomba?
# hcitool scan
Scanning ...
Inquiry failed: Connection timed out
No...

Ok, maybe reset the bluetooth adapter?
# hciconfig hci0 reset
# hcitool scan                              
Scanning ...                                                                  
        00:11:22:33:44:55       FireFly-176B   

That's more like it.

Step three: connect it using rfcomm

#rfcomm connect 5 00:11:22:33:44:55
Connected /dev/rfcomm5 to 00:11:22:33:44:55 on channel 1
Press CTRL-C for hangup
Ok, so now i can send commands to it using serial in python as it says in the SCI Specs! And yes i can send whatever i want. Unfortunately the Roomba isn't impressed. At all.


At least until i stumbled across python-library-for-roomba-sci.html and now it works fine. Seems to be related to the fact that it likes money (send it dollars and you're in business: self.port.write("$$$")).

20120227

Filament spool holder for Makerbot ToM

A couple of simple parts to hold the spool over the ToM.


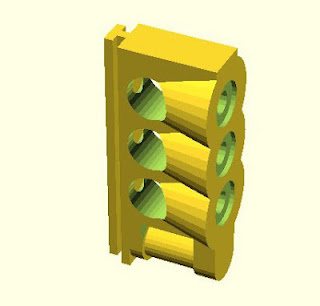
The feet that fit the holes in the top of a ToM with some space to feed cables through. Mirror them so that you have at least one with the opening on the left and one on the right. The other two don't matter as there aren't any cables comes out the holes where the fit in.


The top corners.

I've printed the parts with different fill settings: 0, 30 and 50. All seem ok, the horizontal holes weren't completely round: 
  1. there was some warping, which caused the holes to be too small - printed again with less warping,
  2. the top of the horizontal holes is tricky as it printed these along the axis, in free space, they work fine after a bit of cleanup.
As you can see in the pictures you'll need four feet and two corners.

Cut some pvc tubing to the right length, i've used something like 4x 17cm and 1x 32cm (should be at least 27cm). Done! 

Some additional pictures:


Get OpenSCAD from www.OpenSCAD.org
Printed from replicatorg-0029_r2 on linux (just saw 0031 was released today)